Sunday 17 June 2018

Resin Pour Table 2

I decided to be a little more accurate with the next accent table resin pour.  This time taking the time to sand, primer paint and do a individual cup pour rather than a dirty pour.
This is the little stool I started with.  Unsanded and rough.

I removed the awful vinyl cover and removed the top from the legs.  Gave the wooden top a good sanding and scrubbed the legs with steel wool and cleaner.

What a difference it made. A bit of muscle but necessary. 


Priming the wood with primer paint made all the difference in the world.  It brightened the resin after drying.

All primed and elevated with a few
 little cups.


The hardest thing is waiting for the primer to dry.  Patience has never been one of my best virtues.

After a few hours it was fun time.  Mixing the resin and deciding on colors and best of all doing the pour.

Mixed more green this time to change it up just a bit.
I added a spray of 3-1 silicone lubricant to the main color as well.  This should create a few nice cells in the resin.  So I've read.

Instead of a dirty pour (all colors poured into one cup) I poured the colors individually onto the table top. 


Base color a beautiful sea green.


Starting with the base or primary color I poured trying to be a bit random and leaving white areas.  ( Just a note: I would pour a thinner  pour next time as the base color kind of blobbed)

Then tricked the next color on top and around.


Trying to be random 

And trickled the remainder colors randomly over the top again.


Already looks cool.

Then picking up and tilting the table top around and around until the top was all covered.  Making sure that the pour ran down the edges to finish the piece.

Covered the piece with a clean plastic bin and let it harden.

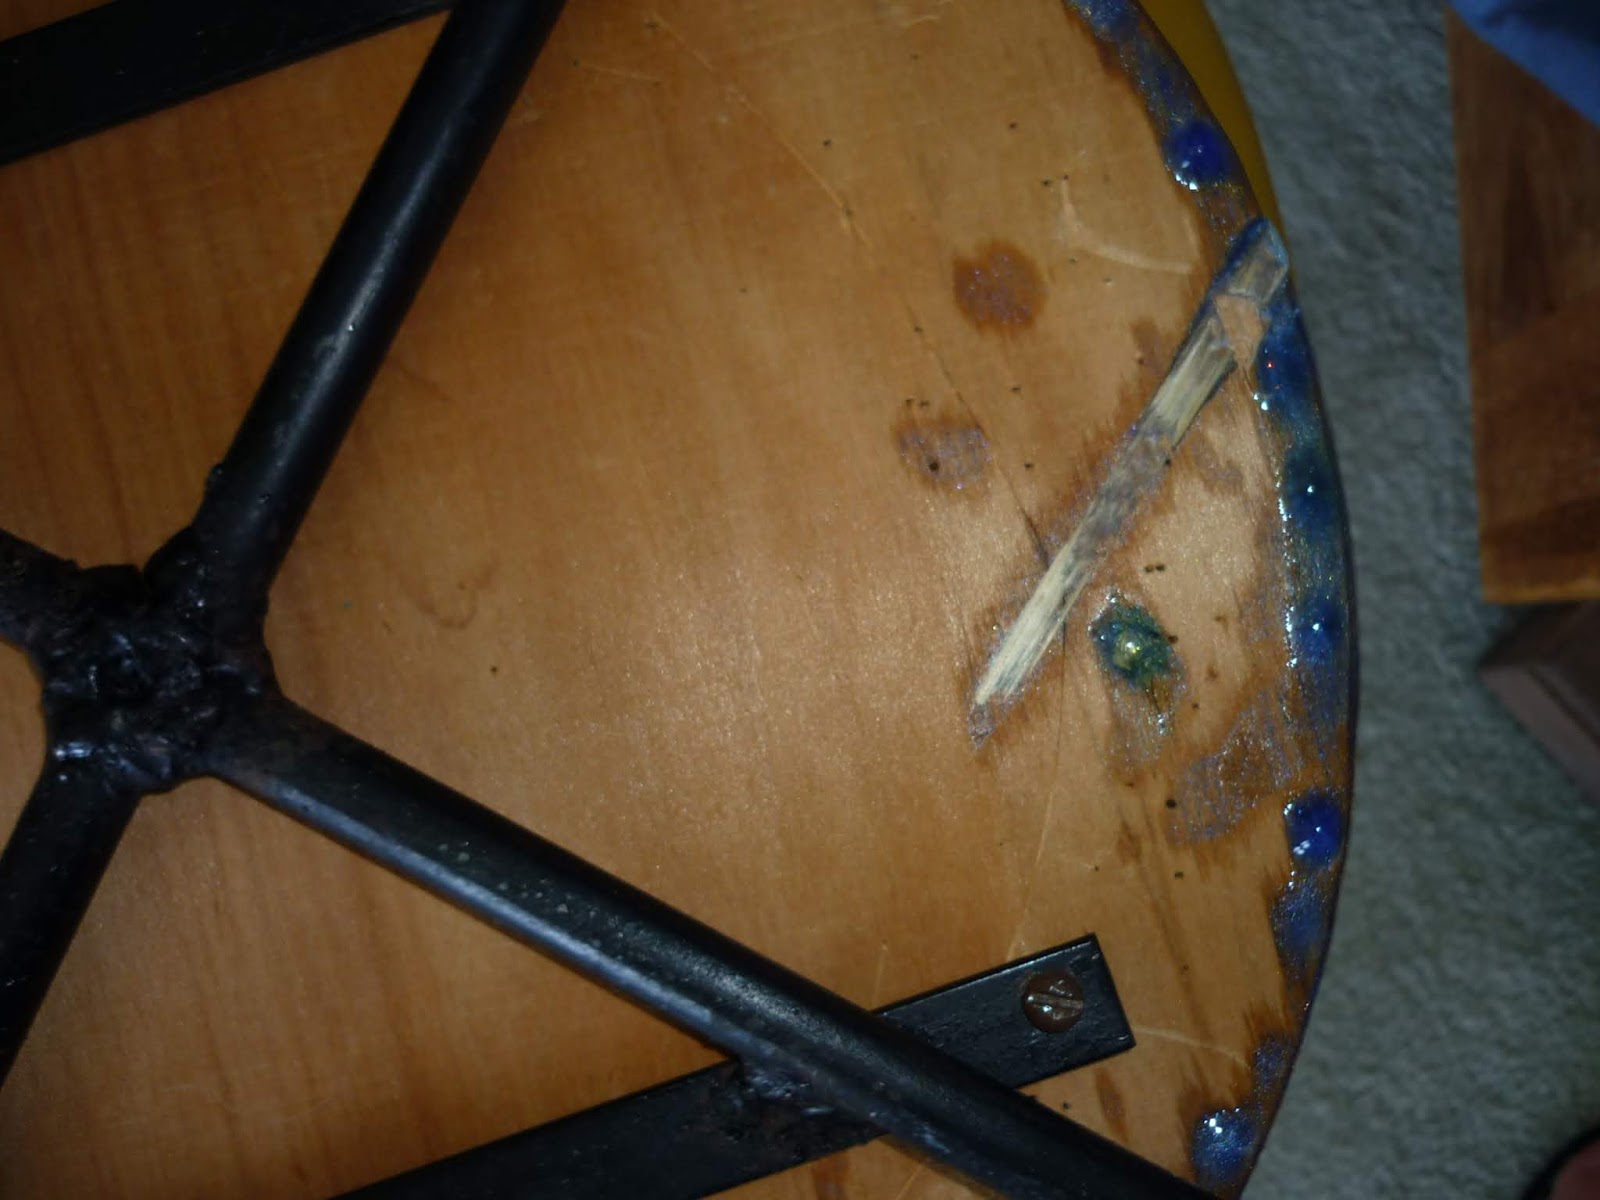
About 20 minutes into the hardening stage I used a paint stick to clean off the underside drip and because the edges where so thin I used the overflow to re-coat the edges. 

Another 20 minutes and I repeated the process even though the resin was getting very thick.  I was glad I did this as the finished result is beautiful.

Very cool.  You can see small cells but next time I will try for larger ones.


Even going back twice to add to the edges they did not
come out as thick or colorful as I would have liked.


Very happy with the end result of my second resin experiment.


Monday 4 June 2018

Dirty Resin Pour update

For my first dirty pour I think it turned out pretty good.  There are definitely a few does and don't to keep in mind.

1.) make sure that the piece is elevated enough that you can clean off the drips about an hour after you cover your piece.

even though the drips are on the underside it would look better
to have cleaned them up before they hardened.

2.) make sure that whatever you use to elevate the piece goes into the center.  The sticks that I used adhered to underside and I had quite the time cutting them off this morning.

Not a great finished look and I will not make that mistake again.
3.) Make sure your piece is well sanded and next time I will paint or clean it up well.  You can see the wood grain and the rough edges of the wood.  The resin was to clear to cover up all the little imperfections.  Although that may be an advantage in the right application.

You can feel the un-sanded edges.

All in all it turned out beautiful and I am looking forward to doing another fixing the mistakes I made on this one.  I looks great between the morning chairs in the sitting room and a perfect size to hold a couple of coffees.

Looks great next to the new peacock chairs.


A fun and pretty side table.


Saturday 2 June 2018

Dirty Resin Pour

I has been months since I updated the Twisted Blog.  It was hard enough getting the fromthe.blue blog posted on a haphazard scheduled that I let this one slip.  But we are back, in a house and set up to try new and wonderful things.

Taking a break from the renovating for a day or two I set up my craft room and decided to try a dirty pour with resin.  I found 3 little stools in among all the other old furniture of the house and took them apart to resin the seats to make small tables with. 
Old seats on level table.

 Making sure that the table was level, laying down plastic and setting the seat on a couple of pieces of wood to lift it off the table.


Then getting all of the cups and resin ready, again on plastic to protect the table and my stir sticks all set up and ready to stir.


ready to start


Sort out which colors I want to use. Since I want the table to sit between the new peacock chairs that came in yesterday I selected matching colors.


Blues, purple, green and gold. 


New peacock chairs


carefully measured
Once everything was at hand carefully mix the hardener and resin, stir, stir and when you think you are done stir again.  I don't worry to much about the bubbles as you the heat gun will take care of those.


After all the resin has been mixed and poured into individual cup I mix in the resin and then pour all back into the original cup without mixing them.  I would have take a photo but my hands got all sticky (not good for the camera) and then Tyler to the rescue and take photos of the magical part.

Place the disk on cup and turn upside down.

 After inverting the cup and disk allow the resin in the cup to flow down the sides and then remove the cup.


When you lift cup the resin flows out.


The colors are wonderful and look at all those bubbles.  Time for the heat gun to come out and gently blow out all the bubbles.


look at all the bubbles


Gently from a few inches off the resin move back and forth and around to pop the bubbles without thinning out the resin to much.  I think I did on this first piece but know not to do that again.  I think I will try a propane torch next time to get rid of the bubbles.

coming along great.
No more bubbles.......Stop!!


 Even though I tried not to blend the colors more than necessary they blended more than I would have liked.


The final look before covering to keep the dust and kitty hair out.  It will be so interesting to see what it looks like tomorrow.
Before the dust cover went on.


Mom's Little Monsters.

 I've been having a ball making Mom's Little Monsters on days that we are not renovating Tyler's shop.   Lurch Lurch in his butl...